Seafood Corn Chowder

1 Comment

seafood-corn-chowder

In the interests of full disclosure:

  • this is not my recipe
  • nor have I made it before…

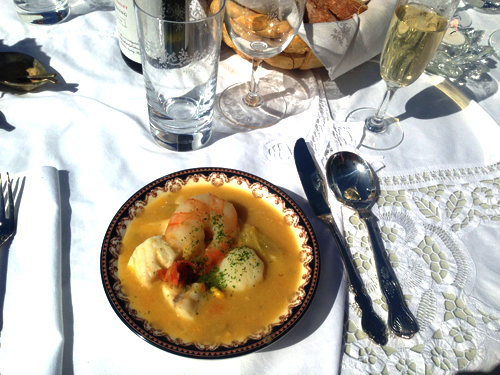
I have enjoyed it at my friend Victoria’s home however, where she has made it to begin the Good Friday lunch that her family host each year (they also own and run a beautiful Barossa Valley winery and restaurant, Lou Miranda Estate).

I shared a photo of it on my Instagram account and the recipe was requested, so here it is…

Seafood Corn Chowder Recipe

Cooking time 1-1.5 hours
Serves 10 average size bowls

Ingredients:

  • 5 litres fish stock
  • 100g butter
  • 50ml olive oil
  • 2 onions
  • 3 cloves garlic
  • 4 celery sticks
  • 4 carrots
  • 3 leeks
  • 600g canned corn
  • 6 large potatoes
  • Bay leaf
  • Thyme
  • Salt and pepper to taste
  • 600ml cream (Optional – Victoria said she removed my server – sans cream – from the pot before adding cream, tasted it, and decided it tasted better without so everyone went dairy free!)
  • Scallops
  • Prawns
  • Fish (The quantity of seafood is up to you. Victoria uses about 3 prawns and scallops, and 2 chunks of fish per person)
  • Vegetable stock cube  (Optional)
  • Parsley to serve

Method:

  1. Heat the butter and oil in a large pot on a medium to high heat. The pot will need to be big enough to make up to 7 litres.
  2. Dice onion, garlic, celery, carrot and leeks, place them into the heated butter and oil, cook until onions are translucent.
  3. Chop potatoes into small chunks (the bigger the potato pieces means you need to cook the soup for longer). Tie the bay leaf and thyme with some cooking string, you need to be able to remove this from the pot before blending the soup.
  4. Add the potatoes, corn, bay leaf and thyme to the pot and cover with the fish stock, once the stock has come to the boil reduce to a simmer. If you do not have enough fish stock you can top the pot up with water.
  5. Season with salt and pepper to taste. If you find you need more flavour add the vegetable stock cube.
  6. When the potatoes are cooked through use a stick blender to make the soup smooth. Add the cream – if you choose to – and continue to cook on a simmer
  7. 10-15 minutes before you are ready to serve add the scallops, prawns and fish.
  8. Once the fish looks like it is cooked through, serve the soup in a bowl with finally chopped parsley.

Buon appetito!

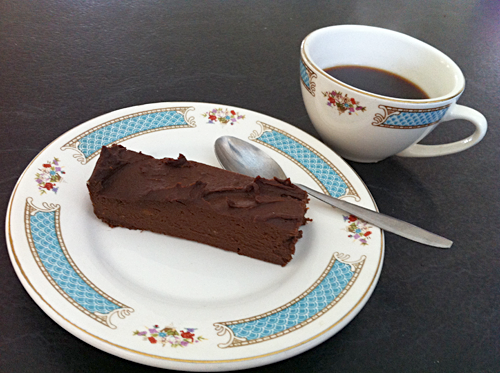
Vegan chocolate fudge

2 Comments

Gluten free and vegan chocolate fudge recipe

I think I should rename this blog “Long Weekend Cooking and Recipes” as the only time I seem to be able to try new recipes and post them these days is on long weekends!

I was put onto this recipe by a friend of mine who is also dairy intolerant. She hasn’t tried it yet, so I happily played guinea pig. So did my unsuspecting friends who had some at a long weekend lunch. I did tell them that it was vegan, but what I neglected to tell them is that the core ingredient is… sweet potato.

Yup. Good ol’ sweet potato. I’ve actually read about it being a good base in a few vegan recipes, and while I was dubious, I think it works well! It’s very filling, holds together, and does tend to take on the flavours of what it is mixed with.

Don’t believe me? Try it yourself!

The original recipe is here, and a it’s very good post well worth a read.

Gluten-free and Vegan Chocolate Fudge

Ingredients:

  • 500g sweet potato, peeled and cubed
  • 8 medjool dates, pitted and chopped
  • 200g dark chocolate (dairy and gluten free, I used Lindt 70% dark chocolate, and I only used 150g. No, I didn’t eat the rest of it!)
  • 2 teaspoons vanilla extract
  • 1 tablespoon chia seeds
  • 4 tablespoons coconut milk
  • Pinch of salt

You can also add other slice and fudge-like things such as cranberries, chopped nuts, sultanas, coconut etc. I didn’t.

Method:

  1. Combine chia and coconut milk and set aside to soak.
  2. Steam sweet potato until very tender.
  3. Mash well.
  4. Add chocolate and stir until melted in.
  5. Add dates and stir.
  6. Blend all ingredients together until smooth, and stir in any extras.
  7. Pour and press into a lined slice tray, and refrigerate for a few hours before serving.

I’ll warn you, it is REALLY rich still. So keep your slices small.

Let me know what you think!

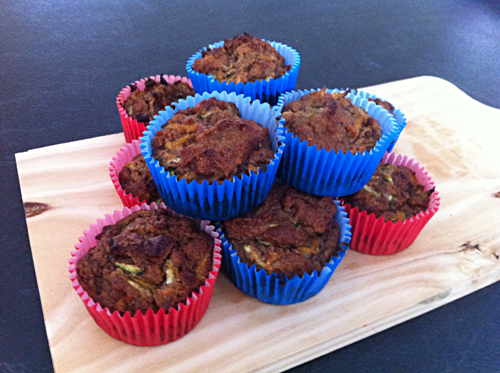
Gluten and dairy free carrot and zucchini muffins

Leave a comment

gluten and dairy free carrot and zucchini muffins recipe

As mentioned in my previous post, I seem to only cook new recipes and have time to blog on long weekends, now, so thank you very much to the Queen for having a birthday!

I’m really lucky to have a lot of friends who also like cooking (and eating) and sharing their healthy recipes, such as this one, thanks Jacqui!

I’ve been looking for a good vegetable-based snack recipe for a while that’s not uber expensive to make, and this one fits the bill!

Despite our oven being rubbish, they turned out really well. I think with a better oven they would have risen a bit more, but maybe let me know how you go…

Gluten and Dairy-free Carrot and Zucchini Muffins

Ingredients:

  • 2 cups almond meal
  • 2 whisked eggs
  • 1 tablespoon coconut flour
  • ½ cup  carrots, peeled and grated (this was about 1 smallish carrot for me)
  • ¾ cup zucchini, grated (this was about 3/4 of a regular size zucchini for me)
  • ¼ cup raw honey, melted
  • ¼ cup organic coconut oil, melted
  • 1 teaspoon vanilla extract
  • 1 ½ teaspoon cinnamon
  • ½ teaspoon baking powder
  • ½ teaspoon sea salt
  • 1/8 cup sultanas (optional, I actually had these out on the bench but forgot to put them in! Will have to try again with them)

Method:

  1. Preheat oven to 180 degrees celcius.
  2. Prepare muffin pan by placing liners in each hole (I found that my muffins stuck a bit, so maybe spray them with some olive oil spray first).
  3. Combine dry ingredients together in a mixing bowl (almond meal, coconut flour, cinnamon, baking soda and sea salt).
  4. Melt honey and coconut oil together, then allow to cool slightly (so you don’t cook the eggs) and combine them with the remaining wet ingredients in another bowl (eggs, raw honey, organic coconut oil and vanilla extract).
  5. Add wet ingredients to  dry ingredients and stir until combined.
  6. Add grated carrots, grated zucchini and sultanas, and stir all ingredients together.
  7. Using a tablespoon, add the mixture to each muffin liner. Each liner should be ½ to ¾ full.
  8. Place muffin pan in the oven and bake for about 25-30 minutes.

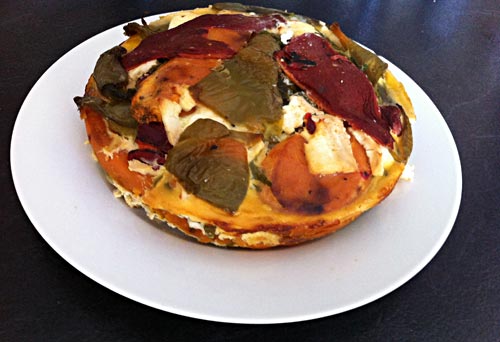
Roast vegetable frittata

Leave a comment

Gluten Free Roast Vegetable Frittata

Oh my. I can’t believe how long it has been since my last post.

But in my defence, in the last couple of months I started working for myself and got married. So there.

Thankfully after all this busy-ness, we recently had a public holiday, which is my favourite excuse to have a BBQ lunch and catch up with friends.

The friends in question have recently had a baby (and one is vegetarian), so we were after a quick and easy lunch. It was also about 40˙C  so weren’t keen for hot food… this frittata is just the ticket! It can be made the day before and is delicious cold, making it great for picnics and similar occasions.

It’s chocked full of vegetables and protein, making it wonderfully filling and satisfying, without being too stodgy.

The vegetable ingredients below are a suggestion only, and you can replace, use anything you have to hand.

You can also leave out the cheese and make it dairy free as well.

Gluten-free Roast Vegetable Frittata

Ingredients:

The below vegetable and herb ingredients are a guide only. You can easily substitute your preferred vegetables, or use those at hand.

  • 1 x sweet potato
  • 1-2 x capsicums, roasted (or you can use bought roast capsicums from the deli section or jarred)
  • Handful baby spinach or rocket
  • Few sprigs of fresh basil or parsley
  • 6-8 eggs
  • 150grams (ish) fetta (optional, leave it out to make this dish dairy free. FYI, I use goat’s fetta)
  • Olive oil
  • Salt and pepper to taste

Method:

  1. Preheat oven to 180˙C (for pre-roasting the vegetables, then cooking the frittata).
  2. Grease and line a square or round baking tin for the frittata. I recommend a round one with releasable sides.
  3. Peel and slice the sweet potato into approximately 5mm thick slices. Place in a baking tray drizzled with olive oil and bake for 10-15 minutes, until soft. Remove from oven and cool.
  4. Slice and de-seed capsicums (if using fresh). You can either roast them with the sweet potato, or place under a grill, skin side towards the heat/flame. Cook for a few minutes, and keep an eye on them as the skin starts to pucker and blacken. Don’t worry about the skin burning, this is ideal. Try to get as much of the skin blackened as possible.
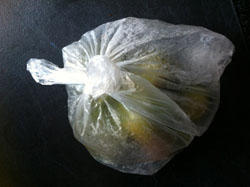
  5. Roasted capsicums in plastic bag. Looks weird, but it works.

    Roasted capsicums in plastic bag. Looks weird, but it works.

    Remove the capsicum from either the baking dish or grill, place in a plastic bag and seal. Stay with me here… this is a trick my Dad taught me on how to easily make your own roasted capsicum.

  6. Leave the capsicum in the plastic bag for about 5-10 minutes so that it steams up. This is a great time to be preparing other vegetables etc. Remove capsicum from bag, and peel away the skin. If using the grill method, this burning and then steaming makes it really easy to remove, while also giving it a lovely roasted flavour. Don’t worry if you can’t remove all the skin, just remove as much as possible.
  7. Rinse any fresh leaves that you’ll be using, and slice the fetta into 5mm thick slices (if using).
  8. Begin your frittata assembly by lining the baking tin with a layer of sweet potato, then capsicum, then spinach/rocket/herbs, then some crumbled fetta, and repeat until your baking tin is nearly filled to the top.
  9. Now crack 6 eggs into a bowl or jug, season with salt and pepper (though I don’t recommend using salt if also including fetta, as it can become too salty), and mix to combine. I also recommend starting off with 6 eggs so that your tin doesn’t overflow…
  10. Pour seasoned egg mixture into tin over vegetables. Pour through the gaps, and turn the tin to make sure the egg fills up all the spaces. If you can’t see the egg mixture through the top layer, crack, beat and add 1-2 more eggs until you can see the egg.
  11. Place frittata in oven and cook for 30-45 minutes until firm to the touch, and you are sure all the egg is cooked. This time will vary depending on your oven. It actually took 1 hour in mine. It’s much better to be safe and overcook (providing you don’t burn it) than undercook though.
  12. Once cooked, remove from oven, and allow to cool in baking tin for 5-10 minutes, just to make sure it stays firm. Then remove from tin, and serve warm or cool completely to serve cold.

Enjoy! Let me know any other vegetables you would, or do add to yours in the comments!

Gluten and dairy free Christmas balls!

Leave a comment

gluten-dairy-free-Christmas-balls

I love Christmas time, but it can be annoying for people with food allergies and intolerances. All of the extra eating and visiting and snacking can become stressful when you’re having to worry about what’s in the food on offer.

It can also be stressful for people who are hosting guests who have food intolerances and allergies.

That’s why these little gems are a blessing. They’re pretty easy to make, and taste (to me anyway) much like traditional rum balls, making them good for everyone! (unless you’ve got a nut or fructose allergy… can’t please everyone!)

Dairy and gluten free Christmas balls (and vegan!)

Makes 18 balls (about the size of the small ball you get with a petanque set, you know the one?)

About 15 minutes preparation time, but allow 1-2 hours refrigeration before serving

Ingredients:

This is one of those recipes that you can substitute ingredients, but it does help to have a guide for proportions to get the consistency for rolling right. This is the combination that works best for me…

  • 1 cup nuts (I used about half brazil, half walnuts and some pistachios thrown in for good measure)
  • 8 prunes or dates (if using dates, soak them in water for at least 4 hours before making, discard water)
  • 1/4 cup dried cranberries
  • 2 tablespoons cocoa or cacao powder
  • 1 tablespoon honey (or omit if wanting to reduce sugar, or to make the balls vegan. You may need an extra prune or two though for the consistency)
  • 1 teaspoon vanilla essence
  • desiccated coconut (for rolling the balls in)

Method:

  1. Blend nuts in blender of food processor to desired consistency. I like a medium consistency, not too fine.
  2. Add all other ingredients, except coconut, and blend until combined.
  3. Test the consistency of the mix by trying to roll a ball. If it is too crumbly, add another prune or some more honey to moisten, and blend again.
  4. Once you’re happy with the mixture, roll the mixture into balls with your hands. I like to use a teaspoon to help get a consistent and snack size ball.
  5. After rolling each ball with your hands, roll them in the coconut until coated.
  6. Refrigerate for at least 1-2 hours before serving, and enjoy!

Merry Christmas!

Pumpkin pie

Leave a comment

I don’t care about your back story, just take me to the recipe.

I had my first encounter with pumpkin pie when Mr S and I were in New York last year for the marathon. It wasn’t quite Thanksgiving, but there were pumpkins everywhere and pumpkin pie on most menus so we gave it a go. I only had a little scoop of the filling (as it had cream in it) but liked it and vowed to make my own gluten and dairy free version for the follow year’s “Thanksgiving”.

Above: Pumpkins for sale in New York City, November 2011.

Being an American event, we don’t celebrate Thanksgiving in Australia, but the last few years on Twitter have opened up my world to it (as it turns out that I follow a lot of Americans).

While I haven’t researched and understood its beginnings, I really like the tradition of taking time to be with loved ones and recognising what you are thankful for.

Clearly I’m thankful for the Internet, as it allows me to follow incredible people and learn interesting things and find recipes for gluten and dairy free pumpkin pie…

There are an abundance of recipes out there. I ended up selecting this one from the Gluten Free Goddess blog as:

  1. Her pie got the response: “This might be the best pumpkin pie I’ve ever eaten.”
  2. It’s crustless. Which is a huge plus for me as I find gluten and dairy free pastry crumbly, dry, difficult to work with and generally painful. Not things I like when cooking.

We shared the pumpkin pie with some friends who were over for dinner who gave it the thumbs up. I think we were still all a bit… “this is different” mainly because we had never had it before and had no point of reference or “history” for it.

Even our friend Adam appeared to like it, which I’ll take as a compliment as his wife warned me: “Adam doesn’t really like vegetables or desserts, so a dessert made from vegetables could be a push…”*

*That was the general gist of it, I cant’ remember exactly.

Gluten and dairy free crustless pumpkin pie

Ingredients:

For the pie

  • 450ml cooked and pureed pumpkin (I’m not sure how much this is in pumpkin weight… I roasted a whole heap then pureed what I needed and used the rest in a salad)
  • 1 1/2 cups full fat coconut milk (or you can substitute soy or almond milk)
  • 2 teaspoons bourbon vanilla (I used regular vanilla, but I want to find some of this “bourbon vanilla”!)
  • 2 tablespoons light olive oil
  • 2 eggs, lightly beaten, or to make it vegan, substitute the eggs with 1 tablespoon egg replacer
  • 3/4 cup light brown sugar
  • 1/2 cup buckwheat flour, or other gluten free flour (best to have one with a bit of substance though)
  • 2 tablespoons tapioca starch/flour
  • 2 teaspoons baking powder
  • 1/4 teaspoon xanthan gum
  • 1/2 teaspoon sea salt
  • 1 teaspoon cinnamon
  • 1 teaspoon ground ginger
  • 1/2 teaspoon nutmeg

For serving

  • Strawberries or berries
  • Yoghurt or thickened cream (depending on your lactardiness)

Method:

  1. Cut the pumpkin into pieces and roas. You could probably steam it, but I like the roasted flavour. I actually didn’t think about it going into a sweet dish and still seasoned it like I normally would, but it still worked! Cooking time will depend on your oven (ours is slooow) but maybe 45 minutes – 1 hour depending on how much pumpkin, 180˙C or until a skewer easily goes through the pumpkin pieces.
  2. Grease and line a pie tray or round cake tin with baking paper.
  3. And if you don’t still have the oven on from roasting the pumpkin, pre heat your oven to 180˙C.
  4. Puree the pumpkin in a food processor. I know I tend to go on about my “hand held blitzy thingy”, well this is what I’m actually talking about, it’s rad. The blending container also has measurements on it, so you can tell exactly how much pumpkin you have.
  5. Combine with all other ingredients until smooth, then fill the prepared pie tray or tin.
  6. Place in oven and bake for about 1 hour, or until the pie is firm but still has a little give in the centre.
  7. Cool (in tin) on wire rack for about 10 minutes.
  8. Remove from tin, place on place and refrigerate for at least an hour before serving.
  9. Serve with strawberries, yoghurt or other desired accompaniments.

Below: The pumpkin pie making process (and my first experiment with Diptic).

8 (well, 7) hour pulled pork with cherry and peach salsa

2 Comments

Skip the jibber jabber, take me straight to the recipe!

Some people hate photos of food shared on social media channels.

I love them.

I love getting inspiration for new places to go, dishes to order and recipes to make.

So when my Interwebz friend @flooziemagoo posted:

I thought “hellz yeah! I want me some of that edible air!” and promptly copied her and made the same dish. Well, it wasn’t really prompt as it was the next day, and I also started later than I planned to, hence the 7 hours rather than the recommended 8…

The recipe is from this awesome site Iowa Girl Eats. It’s namesake – Kristin – loves cooking and eating and running as well (the latter to counteract the former) so I think we’ld get along famously.

While the pork does take time to make, it has relatively few, and fairly simple ingredients, and one surprising one. The main liquid used by Kristin in the original recipe is Dr Pepper. Yes, the soft drink (or soda). I substituted sarsparilla. It’s quite similar, and it’s what @flooziemagoo used, so clearly I’m going to copy her.

The recipe also calls for chipotle peppers in adobo sauce. I couldn’t find these at my local Foodland, so used chillies and made some adobo sauce. I’ve included the recipe below. You can probably find them at a gourmet grocer or specialty shop though.

The other neat trick I learnt is with the meat itself (shout out to my local butcher!). The pork cut is pork shoulder. Most pork roats are actually pork shoulder, but they have the thick layer of fat that is used for crackling. This recipe doesn’t require the fat, so you can cut this off and if not using immediately, roll it up, seal in cling wrap and freeze it. You can then either cook crackling on its own another time, or wrap it around another roast – even a lamb or beef roast – to give it extra moisture. Pretty cool, huh?

8 Hour Pulled Pork with Cherry and Peach Salsa

Ingredients:

For the pork

  • 1 large brown onion
  • 2kg pork shoulder, excess fat removed
  • salt
  • pepper
  • 4 chipotle peppers in adobo sauce
  • 2 tablespoons adobo sauce (see recipe below)
  • 1/2 cup gluten free BBQ sauce
  • 2 tablespoons brown sugar
  • 600ml sarsparilla

For the salsa

  • 1 cup chopped cherries (stones removed)
  • 1 cup chopped peaches (yellow or white, stones removed)
  • 1/4 cup chopped coriander
  • 1 minced jalapeño
  • 1 lime, juiced
  • dash of salt

For serving

  • Gluten free tortillas or brown rice (cooked to directions) or as one of many dishes in your Mexican feast!

Method:

  1. Slice the onion into quarters, separate the layers and place over the bottom of your slow cooker (oh, did I mention it’s a slow cooker recipe? If you don’t have one, you can also use a large, heavy pot and cook it on low on the stove top, or in the oven).
  2. Trim all excess fat from the pork shoulder, and cut it into 5 or 6 large pieces.
  3. Season each piece of pork generously with salt and pepper.
  4. Add the chipotle peppers, adobo sauce, BBQ sauce, brown sugar and sarsaparilla.
  5. Cook on low for 8 hours (or if you’re running late like me, cook on high for a few hours, then drop it down to low for the last few hours.
  6. And try not to salivate too much.
  7. You can make the salsa ahead of time, and let it marinade in its own sweet spicy goodness… Combine the chopped cherries, peaches, coriander, minced jalapeños, lime juice and salt, mixing everything together. I’ll admit I was a little wary of this combination when first making, and even right before trying, but especially with the pork, it just works!
  8. When the pork is cooked through, oh so tender and falling apart… shred it up, place in a bowl and strain the juices off through a sieve. Then return enough of the juices to cover the meat and keep it moist.
  9. Serve the pulled pork and salsa with gluten free tortillas or brown rice, and enjoy!


Adobo Sauce

If you can’t find adobo sauce, here’s how to make it…

Ingredients:

  • 12 chipotle chillies (or just long red ones if you’re like me and can’t find the others), wiped clean, stemmed, slit open, seeded, and deveined
  • 3/4 cup water for blending, or more if necessary
  • 2 cloves garlic, peeled
  • 1 1/2 teaspoons apple cider vinegar
  • 3/4 teaspoon fine salt
  • 3/4 teaspoon sugar
  • 1/4 rounded teaspoon ground cumin

Method:

  1. Heat a skillet over medium-low heat and toast the chillies, turning them frequently over and pressing them down with the tongs until they’re fragrant and their insides have changed colour slightly. Approximately 1 minute each.
  2. Soak the chillies in enough water to cover them until they are soft (approximately half and hour). Drain and discard the soaking water.
  3. Put the chilies in a blending container with 3/4 cup fresh water and the remaining ingredients. Blend until smooth (approximately 3 minutes) adding a little more water if necessary to puree.
  4. To get a smoother texture, strain the adobo sauce through a medium mesh sieve.

The adobo sauce keeps in the fridge for up to 5 days, or in the freezer for up to 1 month.

Images courtesy of @flooziemagoo. I was too busy trying to eat the air to take any…
Pear tea cake

Leave a comment

So… you may have noticed that I’m making (and eating) a lot of cakes recently. This is a little odd for me. While I do have a very sweet tooth, I seem to focus on cooking savoury (probably because I HAVE such a sweet tooth).

Given I’m not running at the moment as well due to injury it’s probably not the best thing to be doing, but it has been fun (and tasty).

Maybe it’s a winter hibernating thing…? Regardless, I recently made Pear Tea Cake, and it was yum.

I am a creature of habit. I have a coffee at about 3pm every afternoon. My fiance has also gotten into the habit of – when being asked if he’ld also like a coffee – replying with: “And tea cake…?”

Last weekend I gave in and decided to see if I could make one. My goal was to not leave the house. I would only make tea cake if it could be achieved with whatever was already to hand.

Fortunately this recipe is quite easy, and if you’re a long time glutard/lactard, you probably have all of these ingredients close to hand.

The only substitute I had to make was trading the apple (that the recipe listed), for a pear (that I had available). It still worked really well though, so if you plan ahead to make this (instead of my last minute attempt) you could use whichever you prefer.

Oh, and the cake went down a treat. My fiance and our housemate actually couldn’t believe that it was gluten and dairy free… winning!

Gluten and dairy free pear tea cake

Preparation time: 20 minutes
Cooking time: 35-50 minutes (depending on your oven, ours is slooow)
Serves 6 (if you’re lucky, it didn’t last very long in our house)

Ingredients:

  • 100g Nuttelex, chopped
  • 3/4 cup caster sugar
  • 1 teaspoon vanilla extract
  • 2 eggs
  • 1 1/2 cups gluten free, self raising flour, sifted
  • 1/2 cup rice, soy, almond or non-dairy milk of your choice
  • 1 Pink Lady apple, or pear, or any other apple of your choice (or availability)
  • an extra 10g Nuttelex, melted
  • 1 teaspoon cinnamon
  • 1 teaspoon sugar

Method:

  1. Preaheat oven to 180˙C.
  2. Grease and line base and sides of a 20cm round baking tin with baking paper.
  3. Beat Nuttelex, sugar and vanilla with an electric mixer until pale and creamy.
  4. Add eggs and beat until combined.
  5. Add flour and milk, stir well with wooden spoon (not sure what the wooden spoon does, I used a spatula and seemed to work fine).
  6. Spoon mixture into tin and smooth the top, but dont’ put it in the oven just yet.
  7. Cut apple or pear into quarters.
  8. Remove core and slice thinly.
  9. Arrange slices on top of batter, brush with the melted extra Nuttelex, and sprinkle with the combined cinnamon and sugar.
  10. Bake for 30-35 minutes (or depending on your oven, as long as it takes for a skewer to come out clean).
  11. Remove from tin to cool, or serve warm.
  12. Enjoy!

And now it’s time for my afternoon coffee… 🙂

Flourless orange cake

Leave a comment

Just kidding! Here’s a photo of it below. That is a genuine “after” photo above though.

I first made this cake a couple of months ago when we had my brother and sister in law over for Sunday lunch.

It’s such a gorgeous dessert. It’s rich and decadent, but not overbearing like some flourless chocolate cakes can be (can’t believe  I just wrote that!) It must be the zesty orange base that makes it feel fresh rather than heavy.

It’s super moist as well, and would probably last a long time, however it doesn’t seem to last long enough in our house to determine exactly how long that may be…

I actually just had a piece then, nom!

Flourless orange cake

Ingredients:

  • 2 large oranges
  • 5 large eggs
  • 1/2 cup raw sugar
  • 250g almond meal
  • 1 teaspoon gluten free baking powder
  • 2 teaspoons orange liqueur (Optional, I didn’t put this in to my cakes and they were still delicious. Actually, that doesn’t sound like much to me either. Personally I’ld put 1-2 tablespoons in)

Optional “finishers”:

  • Icing sugar (to dust over the top once cook)
  • Cream, non-dairy cream, or sheep’s milk yoghurt (that last one’s my favourite)
  • Strawberries (and for an added treat, cut and soak them for a few hours before in port with a teaspoon of sugar before serving, mmmm…)
  • Or orange syrup made from another orange and 3/4 cup caster sugar (recipe below)

Method:

  1. Place the oranges in a saucepan covered with water. Bring to the boil and simmer for 2 hours, filling the saucepan up with extra water as required.
  2. Remove from water, and allow the oranges to cool.
  3. Preheat the oven to 200˙C.
  4. Grease and line a 20cm round baking tin with baking paper.
  5. Cut the oranges into quarters and blend until smooth either in a food processor or with a handheld blender (pips, peel and all).
  6. Beat the eggs and sugar together.
  7. Mix in the baking powder, stir in the orange puree mixture, and gently fold in the almond meal.
  8. If using orange liqueur, stir this in, then pour the mixture into the baking tin.
  9. Bake for 55 minutes, or until a knife or skewer comes out clean. This will depend on your oven. It took about 1 hour and 5 minutes in ours.
  10. Allow the cake to cool in the tin before removing.
  11. Dust with icing sugar (once completely cool) before serving, or cover with orange syrup (see below). Also serve with cream or yoghurt, and or strawberries if desired.
  12. Store in fridge.

Above: The oranges cooking. On the left, before, and on the right, after. You probably can’t see much of a difference, but they do soften and infuse the water. I need to find something to do with that water! It seems like such a waste…

Orange syrup:

I actually haven’t tried this orange syrup, so if you do, please let me know in the comments.

To make the orange syrup:

  1. While the cake is cooking, use a grater to zest the orange, and also juice the orange (it’s easier if you zest the orange before juicing it).
  2. Place the rind in a saucepan of boiling water and cook for 5 minutes or until soft.
  3. Drain, and return the cooked zest to the pan with the juice from the orange and the 3/4 cup of caster sugar.
  4. Place over low heat and cook for 2-3 minutes or until the sugar dissolves and the syrup thickens.
  5. Once the cake has been removed from the pan, use a skewer to prick the top of the cake (to let the syrup in) and pour the syrup over the cake.
  6. Cut and serve!

Raw cacao biscuit balls

2 Comments

I mentioned before that I’m trying to cut down on sugar, and more specifically, dark chocolate. I love dark chocolate. It’s one of my weaknesses.

Thankfully, I’ve recently found a good substitute. This recipe was recommended to me by a colleague who knows I adore the various raw balls from Goodies & Grains in Adelaide’s Central Markets.

I’ve tried to make them myself before, but just haven’t gotten the specific ingredients, or proportions right. While this recipe isn’t a perfect substitue for the G&G balls, they certainly satisfy my cravings.

The original recipe is from the Running to the Kitchen blog, and it’s author, Gina, seems like a woman after my own heart, loving both running and food.

I’ve adapted the recipe slightly, and find it a good base to add your own “optional extras” to, depending on your own preferences, what you have at hand, and how you’re feeling.

Raw cacao biscuit balls

Makes approximately 10 bite-sized balls.

Ingredients:

  • 1-1 1/2 cups LSA (ground linseed, sunflower seeds and almond meal), or you can make your own by first blending your preferred nut/s
  • 6-12 prunes
  • 1/4 banana
  • 2 tablespoons cacao nibs
  • 1 tablespoon pure cocoa powder (either to add to the mixture, or roll them in afterwards)
  • Pinch salt

Optional extras:

  • Acai powder (e.g. 1-2 teaspoons)
  • Maca powder (e.g. 1-2 tablespoons)
  • Shredded or desiccated coconut
  • Flax seeds or other seeds
  • Chia seeds
  • etc

Method:

  1. Using a food processor or similar device, combine the LSA, banana, 6 prunes (to begin with), cacao nibs, cocoa powder (or reserve to roll them in after), salt, and your choice of extras.
  2. Blend until combined and it begins to form a soft dough (albeit somewhat crumbly). You may need to add extra prunes (1-2 at a time) to get to the desired consistency.
  3. Once you’re happy with your dough, roll into bite-sized balls.
  4. Place on a tray and put in freezer for 30 minutes to become firm.
  5. After 30 minutes, remove from freezer and roll in cocoa powder if desired.
  6. You can also press them into more biscuit-like shapes with a fork, or leave as balls.
  7. Store in fridge or freezer, and consume within 3-5 days (If they last that long that is…)

Older Entries